Oct 27, 2010

chalkboard labels you can make yourself!


A functional craft that is quick, cheap, & easy! Julie, from Less Then Perfect Life of Bliss shows us how to make these awesome chalkboard labels from switchplates!

Love, Renee

Mar 25, 2006

Washcloth Easter Bunnies

You will need the following supplies:

Washcloth
Elastic
Ribbon (optional)
Two Small Wiggle Eyes
Small pom-poms
Chenille Stem
Hot Glue Gun

Instructions:

Fold the washcloth in half to form a triangle. Roll the washcloth from the small point to the long side so that you end up with a long "tube". Fold the "tube" in half. Bend the loose ends back so that they form "ears". Place the elastic around the washcloth so that the "ears" stick out in each direction. Cover the elastic with ribbon if desired. Glue on the wiggle eyes, nose and whiskers.

Dec 26, 2004

Shirt Surgery Tutorial : putting on new sleeves

This tutorial is for turning a short sleeved t-shirt into a baseball sleeved shirt... but really it can be used to replace old sleeves with any type of new sleeve whether it be ruched, princess or puffy sleeves, long or short!

The tutorial is in 3 part picture form.. Click to enlarge


This is a very common way of changing sleeves and alot of people have similar tutorials. That being said, please don't copy my pics.. it took my time to make them. You can always linkback to me if you like (there are banners you can copy at the bottom of this webpage)!

Dec 25, 2004

Tutorial : DIY Ruching

Ruching seems to be a very popular look right now. Here's an example of a nice dress shirt with ruching details (click to enlarge)


I've made a little tutorial for you to use. (click to enlarge)


This is not an original concept by any means, but please dont copy my picture (it took some time to make). You can, however, linkback to this page if you like.

Dec 19, 2004

Turn a Turtleneck Sweater Into a Cute Cardigan!

Im pretty proud of myself on this one.. Please click the pictures to enlarge!!


This sweater was so cute but huge and baggy sweaters look frumpy on me... I wanted to reconstruct it into a nice cardigan so here's how I did it.

I took a t shirt that fits me well and used that to determine how much material to take off the bottom of the sweater and down the middle, adding enough for seam allowance.


I removed that material as well as the turtleneck itself.


I knew I wanted to use this extra material on the top of a cami for underneath my cardigan so I set it aside.

I hemmed the collar, bottom and the area where normally you would have a row of buttons. I tried the cardigan on (don't try this with another shirt under it, it just wont be right unless it fits exactly like your cami would).

I was kind of disappointed, because although it looked nice, it wasn't girlie enough for my taste. I thought awhile and realized I had some tiny little lace that would look soooo cute, so I sewed that down the front. I also sewed in a hook and eye. This is what it looks like at this point::


I had a Lycra camisole with one of those awful shelf bras that normal women just cant pull off.. I removed the bra part and sewed just under the "adjustable slide" so that the front of my cami would remain "stable" and wouldn't slide down (don't you hate that?). I then took the neck that I removed and split it down the seam. I sewed this part to the top of the cami on 3 sides (I followed the armhole and neckline but didn't sew the bottom part to the cami yet) I tried it on to see how it looked, and found that it didn't quite end at the bottom of my bust like I wanted it to... so I added part of the sweater I removed from the bottom and then sewed lace onto the bottom (to match the cardigan of course!). I then finished it off by sewing the bottom of the green to the black cami along the same line I sewed the lace.


The most difficult part of this project was the 'stretch' in the sweater. If you pull on your fabric when it goes through the machine, you'll end up with bunches or wrinkles.. I ended up with some of that on the cami but it's easily remedied with a little tug. This especially happens when you're sewing stretchy fabric to non stretchy (like the lace) so be careful.

Here's the big finale!! (click to enlarge)


Please note I didn't do anything to the side seams or to the armholes.. some people like to re size these for a better fit, but I didn't feel it was necessary in this case.

I'm sorry I didn't have more pictures to share with you, I hope this all makes sense. If you have any questions, my email is at the bottom of this page or please leave a comment (you can leave comments even if you aren't registered with blogger.. Id love to hear from you)

Link to my post at Craftster

Dec 18, 2004

Reconstruction: skirts into camis, button ups into halters, t-shirt surgery

I have some skirts and dresses that are MUCH too big on me.. but they are much too pretty (and some too expensive) to get rid of even on ebay .They have elastic waistbands and I used to wear some of them as shirts under a cardigan (pinned so they wouldn't fall off), but now they are much too big for that..

I would like to make some of them into camisoles and shirts.. I wear a lot of business suits and blazers to work and these would be ideal to wear under one and then for after work (sans jacket) too.

I think I can use some t-shirt reconstruction tutorials to make this happen. Here are a few I'm looking at right now

T shirt corset : so pretty, but mine will be longer ~ Im also going to use her perogi recipe sometime for D ~

Triangle Camisole : she has a lot of great ideas on her site

I have some button up shirts that I'm going to make into halters by cutting under the arms, removing the sleeves, taking in the sides and add lace to the top/making straps. I might also do some ruching or add some ruffles to the front and shorten the sleeves to change them from plain jane into something more girlie like this

~ Links to Other Ideas ~

how to make a pattern from an existing garment


Clothes Surgery : Clothing Tutorials

--- check out the links to the right ----->

I also read where someone took a large long-sleeved turtleneck and did the following steps to make a hoodie:

-took in the sides
-cut a bit off the bottom
-cut off the sleeves to make short ones
-used the sleeve material to make a hood (you split the seams on both and then sew the ends of each piece together to make one long strip of fabric)

I don't know if it will work or not, but the pictures looked cute!

Dec 13, 2004

Microwave heat pack

I'm crafting all of my presents this year and just wouldn't think of anything for one person in particular (click pictures to enlarge)


I originally was going to use the instructions found here, but absolutely 
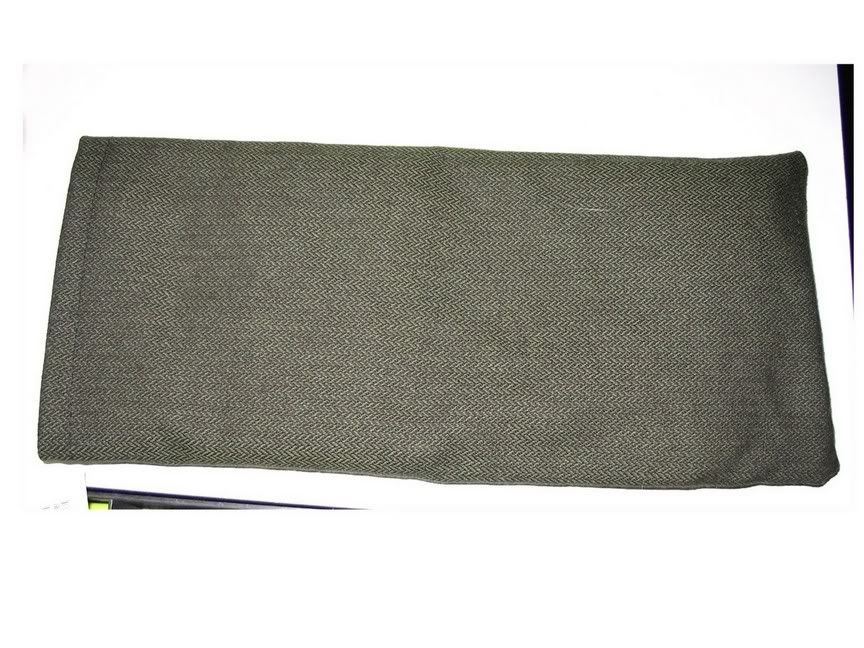
abhor measuring and cutting fabric (this is why I don't get more done) so I decided to use a washcloth for the inner rice-bag and then cut a piece of fabric bigger than that for the outside (so it would fit nice on the side but be bigger lengthwise for sewing purposes). The outside fabric is this great tweed-looking material that feels like flannel (flannel would be ideal I think!) that I have also made a messenger bag out of for a friend.. it's really nice! The outside bag is like a pillowcase, you can take it off to wash and dry (you shouldn't wash the rice-bag obviously!).

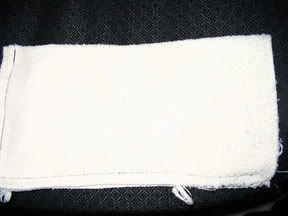
first I folded the washcloth in half and sewed one end and one long side closed (the other long side is already closed). Then you flip it right side (inside) out. You will basically do the same thing for your outside material (making sure the right sides are together when you sew). I suppose the seam allowances should be kept to a minimum unless you want to trim it up before flipping it out.


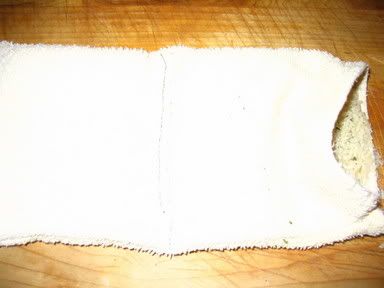
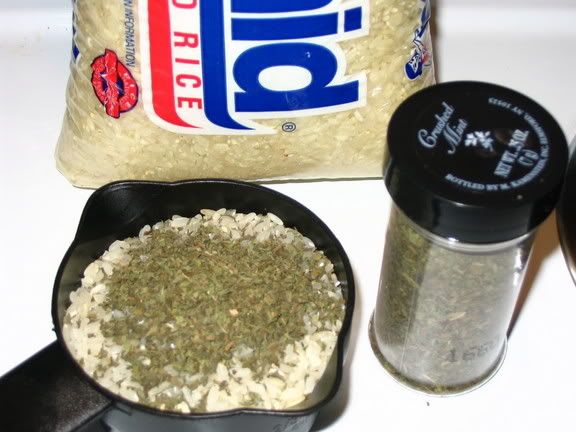
I also decided to make 2 channels so all the rice wouldn't go to one end of the bag when he uses it... I added about a cup of rice (you want to make your bag about half full) and then sewed 2 lines across the middle of the cloth.. then I added another cup of rice before I sewed up the end (do not use instant or minute rice for this!).


I added some crushed mint to the rice because my understanding is that rice tends to smell a little on the sour side (some say it isn't too bad.. others say it gets that way over time) and mint can be like aromatherapy (I wish I had some relaxing lavender). I wasn't quite sure how much to use, so i guessed... and kept putting the bag up to my nose the whole time I was making it! He isn't much into 'smelly' things, so I hope this is OK.. I'm sure he will appreciate it because he often gets aches and pains in his back, especially in the winter.


like I said earlier, for the outside bag you wont sew up the other short side because you want it to be like a pillowcase. Before I flipped it right side out, I simply folded back the end (I cut the fabric about 2 inches longer to be able to do this) and sewed around the top. Then I flipped it right side out and put the rice-bag inside. Viola!

I considered embroidering the outside with his name or even an applique of some sort.. but he isn't fussy and tends to think of things in terms of 'how can this be used' rather than 'how pretty is this' (heh).

here are some forum posts about what to use inside your bag and also some cautionary stories (it can burn if you heat it up too much, don't put it on your eyelids etc.) And here is a really great write-up about microwave heat bags made for hospital patients (this lady uses corn).

Cell Phone Cozy

I looked high and low for cell phone cozy patterns.. all anyone does is crochet or knit them.. and they are VERY sweet.. but what's a girl to do who can only ( just barely) sew?

this is a pattern I found for sewing cozies but I dont like it..

look how FABULOUS this one is!!

thisis what i want to make.. which looks easy enough. I suppose it's 2 pieces of material sewn together and flipped inside out with a lining (much the same way as a regular tote bag) with bias tape for edging and a strap that is sewn on the side and buckles at the front. I guess I can make my own pattern for it and I might even use some batting to make it soft and a little puffy..

will update when I do!